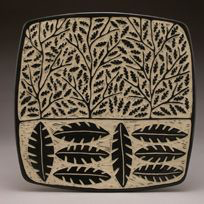
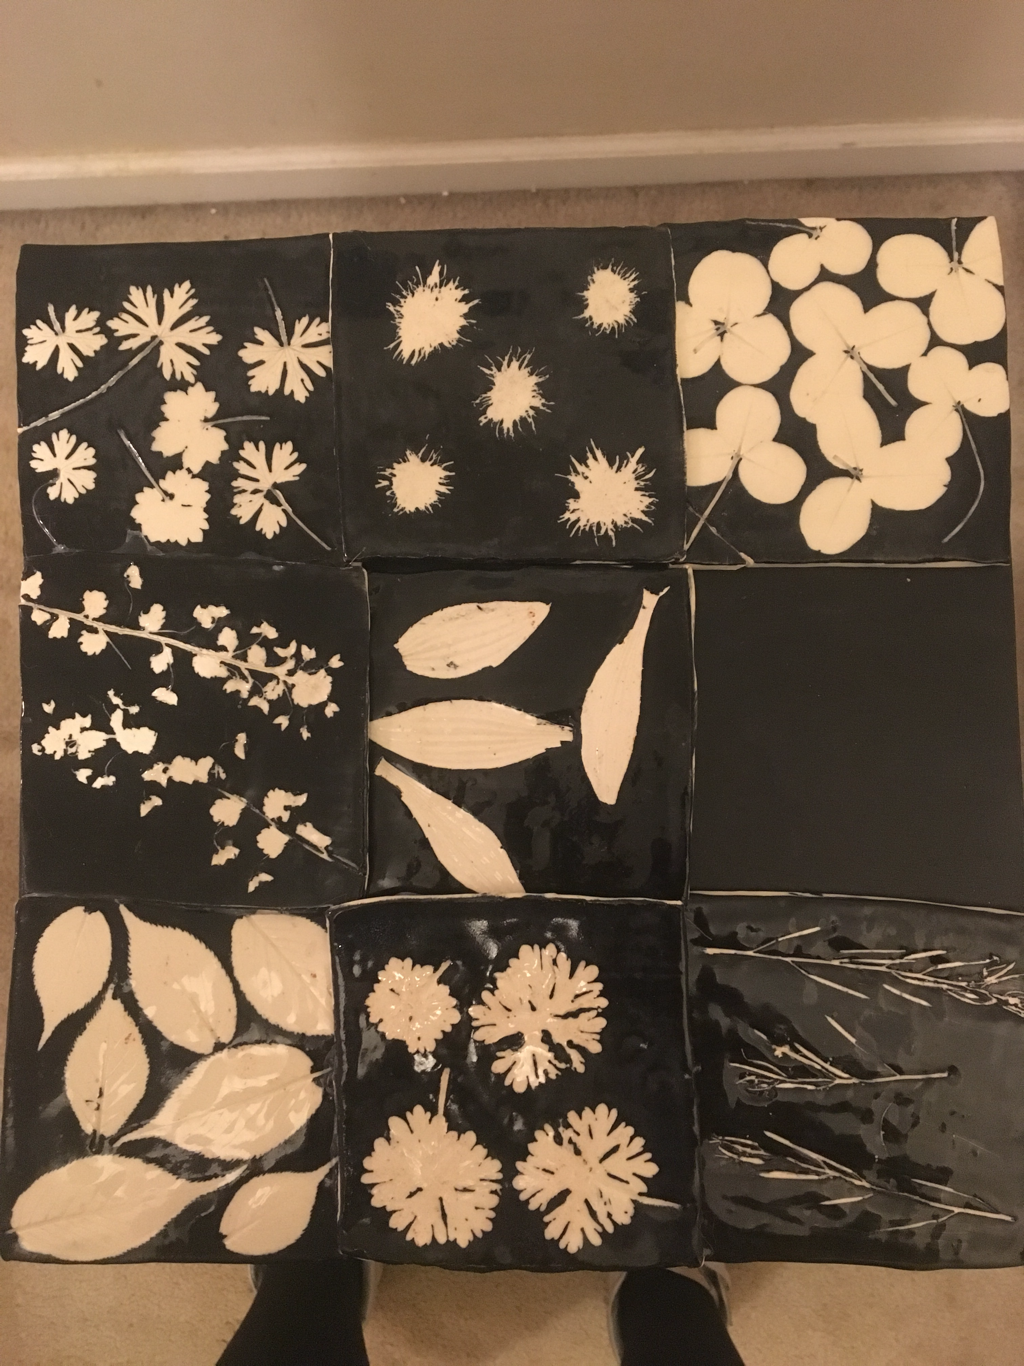
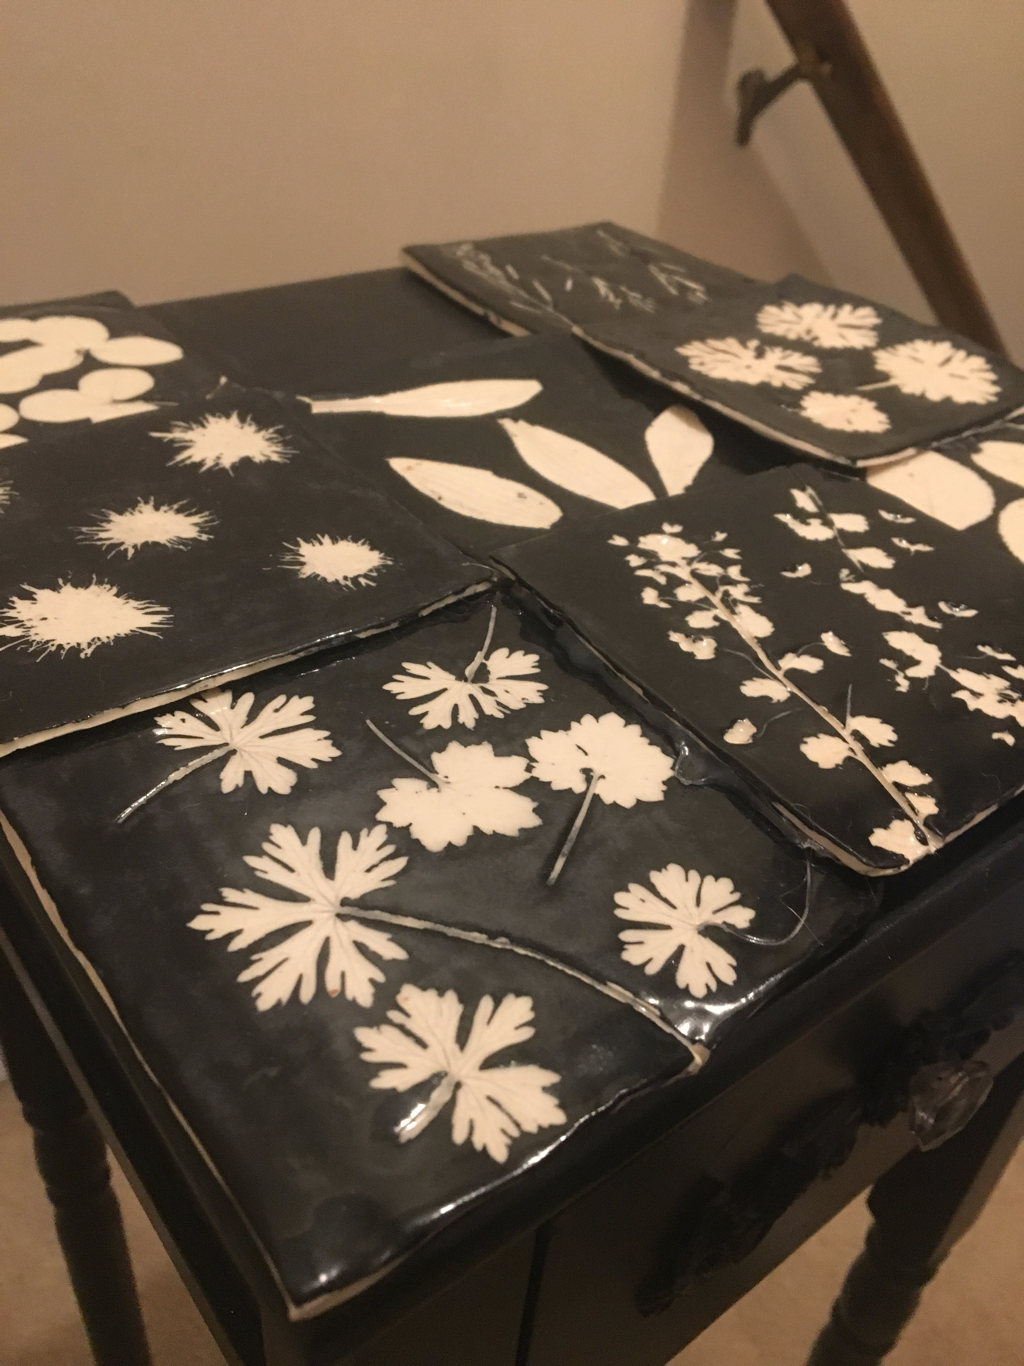
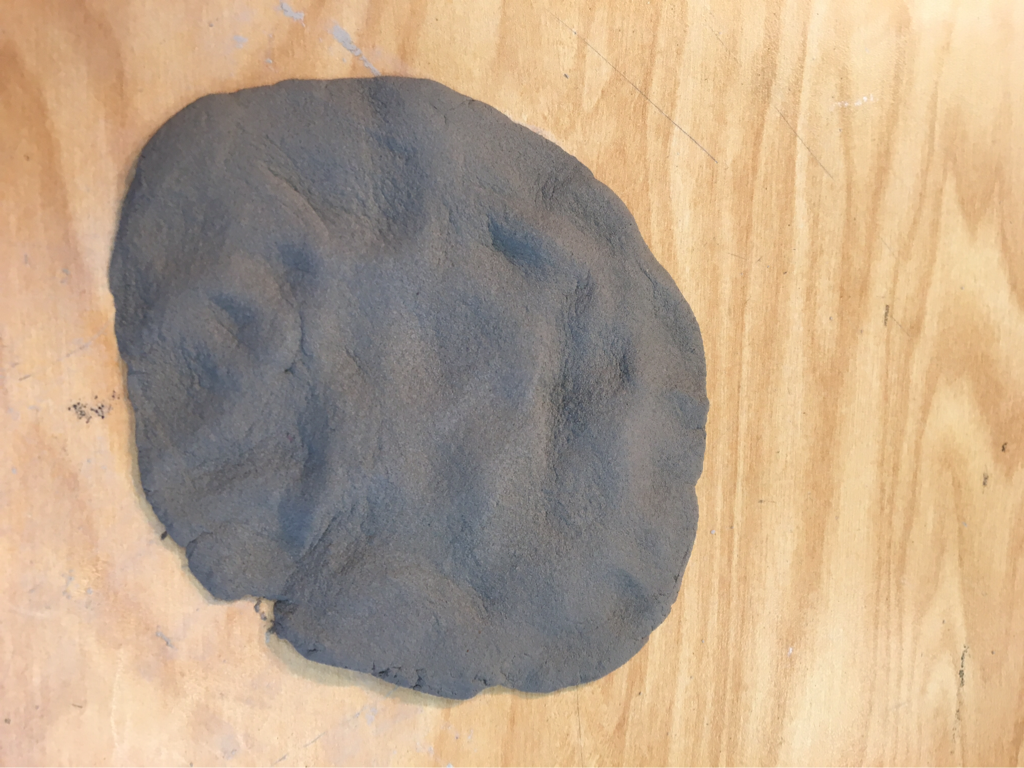
                To make these cute little black and white tiles first I Took a ball of clay and roll that out to a good sized slab then just cutting out equals square shapes in the clay. Then I went outside and took up just some random leaves and flowers around the area, then taking all the plants and pressing them down into each tile to make the imprint of the plant. Then taking the glaze and painting on top of the Clay and also the plants, once the glaze is dry you lift the plants very easy to reveal the unpainted clay.Then you put them in the kiln and once they come out you then put on the clear glaze put it back in the kiln. Finished. I really enjoyed making these pieces every step of the process was very satisfying. My piece was successful in the printing of the plants, I was a little worried about some of them not making the best imprint, but they all turned out great. If I was to do this project again I would make sure the underglaze was painted on thicker so the white plants would stick out better.
0 Comments
Leave a Reply. |
This texture was made buy pressing a rock into the clay to give it a rocky texture. This method of making this texture really has no challenges.
This texture was made buy taking a sponge and pressing down a good amount. It was a little difficult to get the level right on the clay so it had the same look as the lumps in the clouds. But you just had to keep working with it.
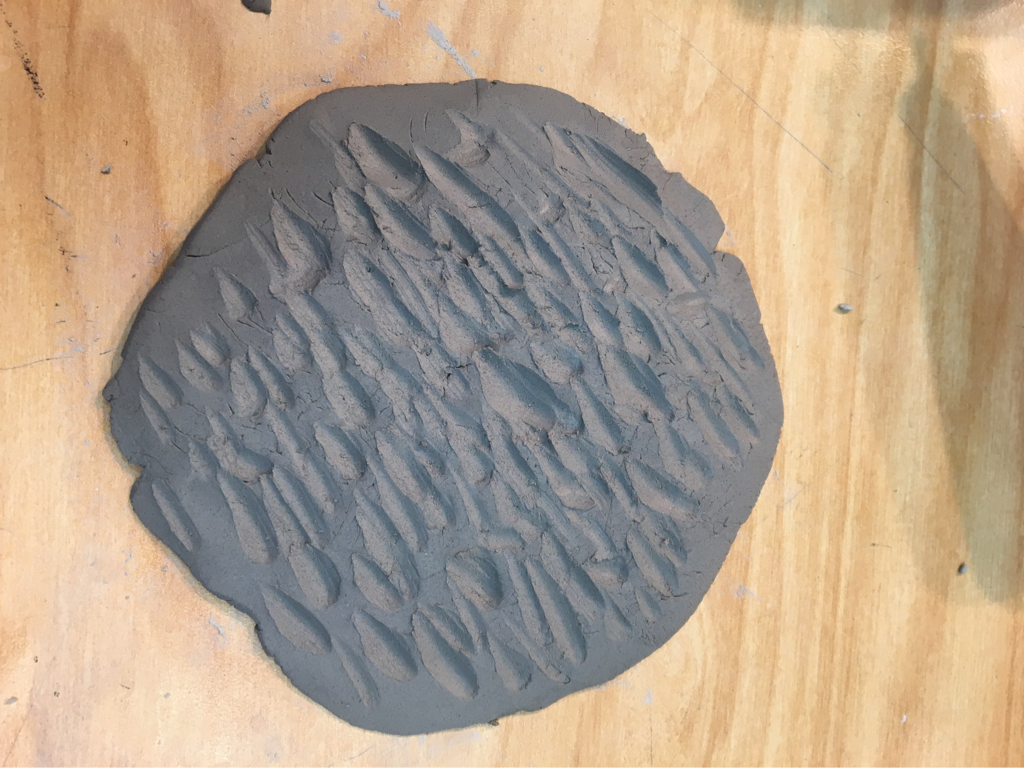
This texture was made buy using the ribbon tool. I just barley marked the top of the clay, making little tick marks. One challenge with this one was that I would mark too deep into the clay so it would be fatter than the other ones, which is not good because the texture is fur.
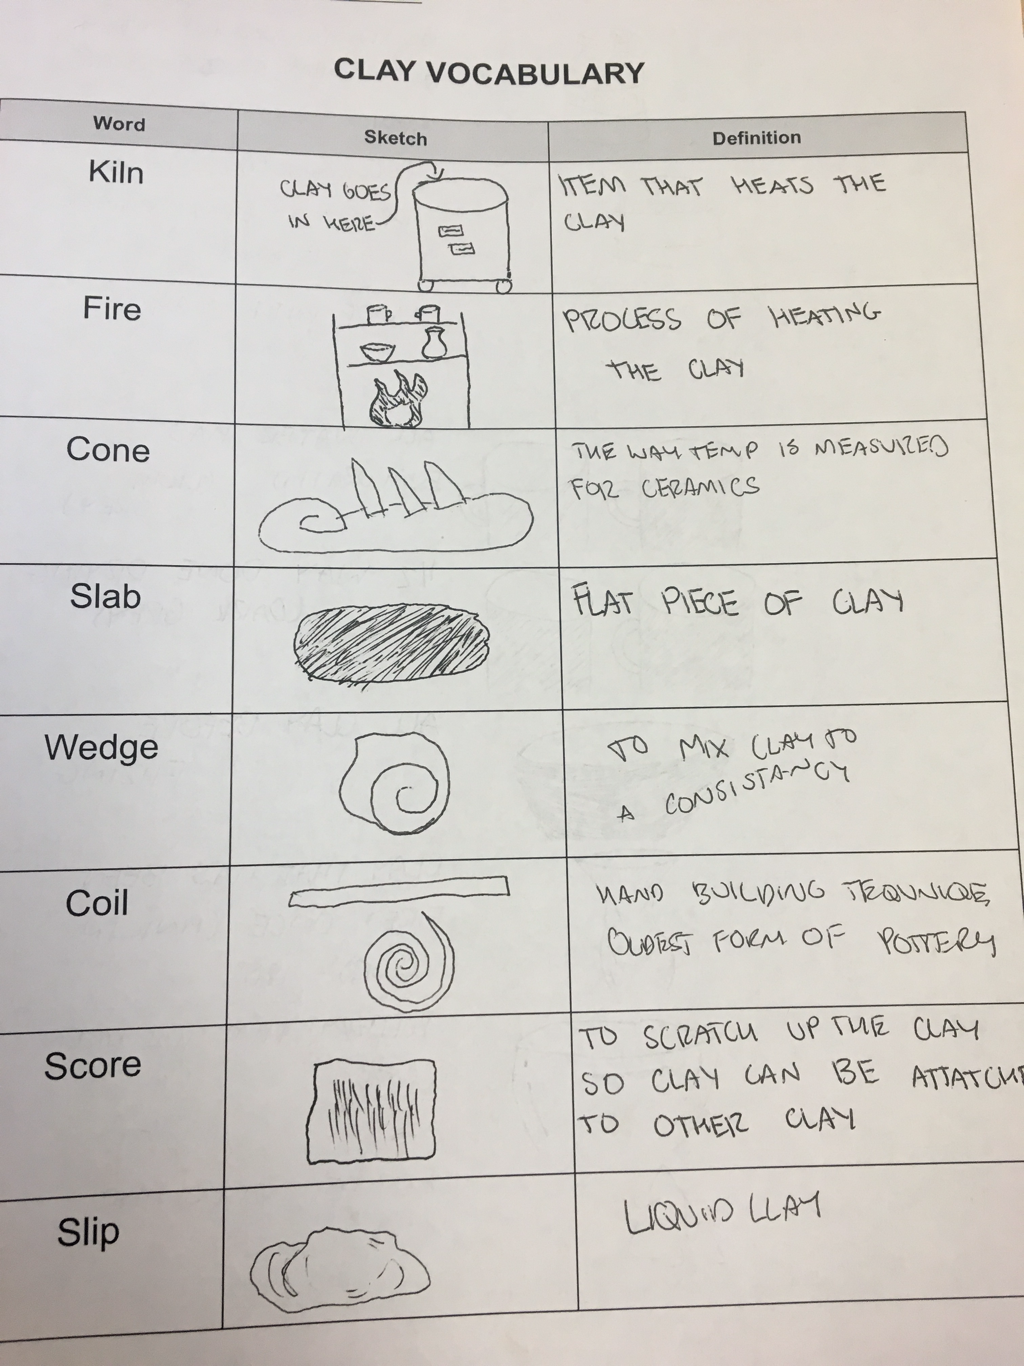
Relief Project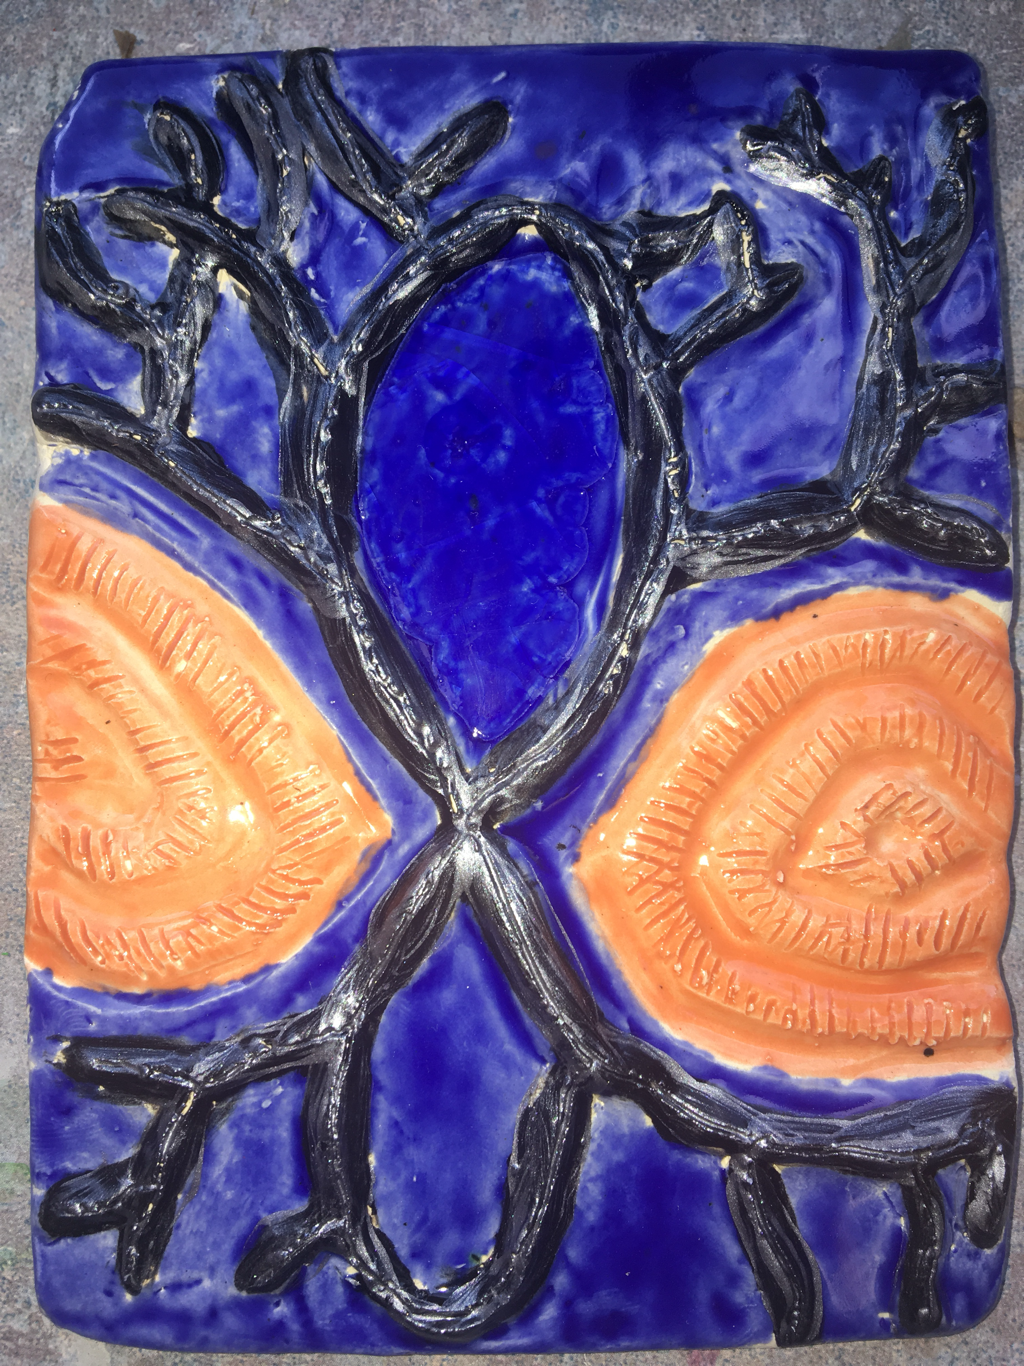
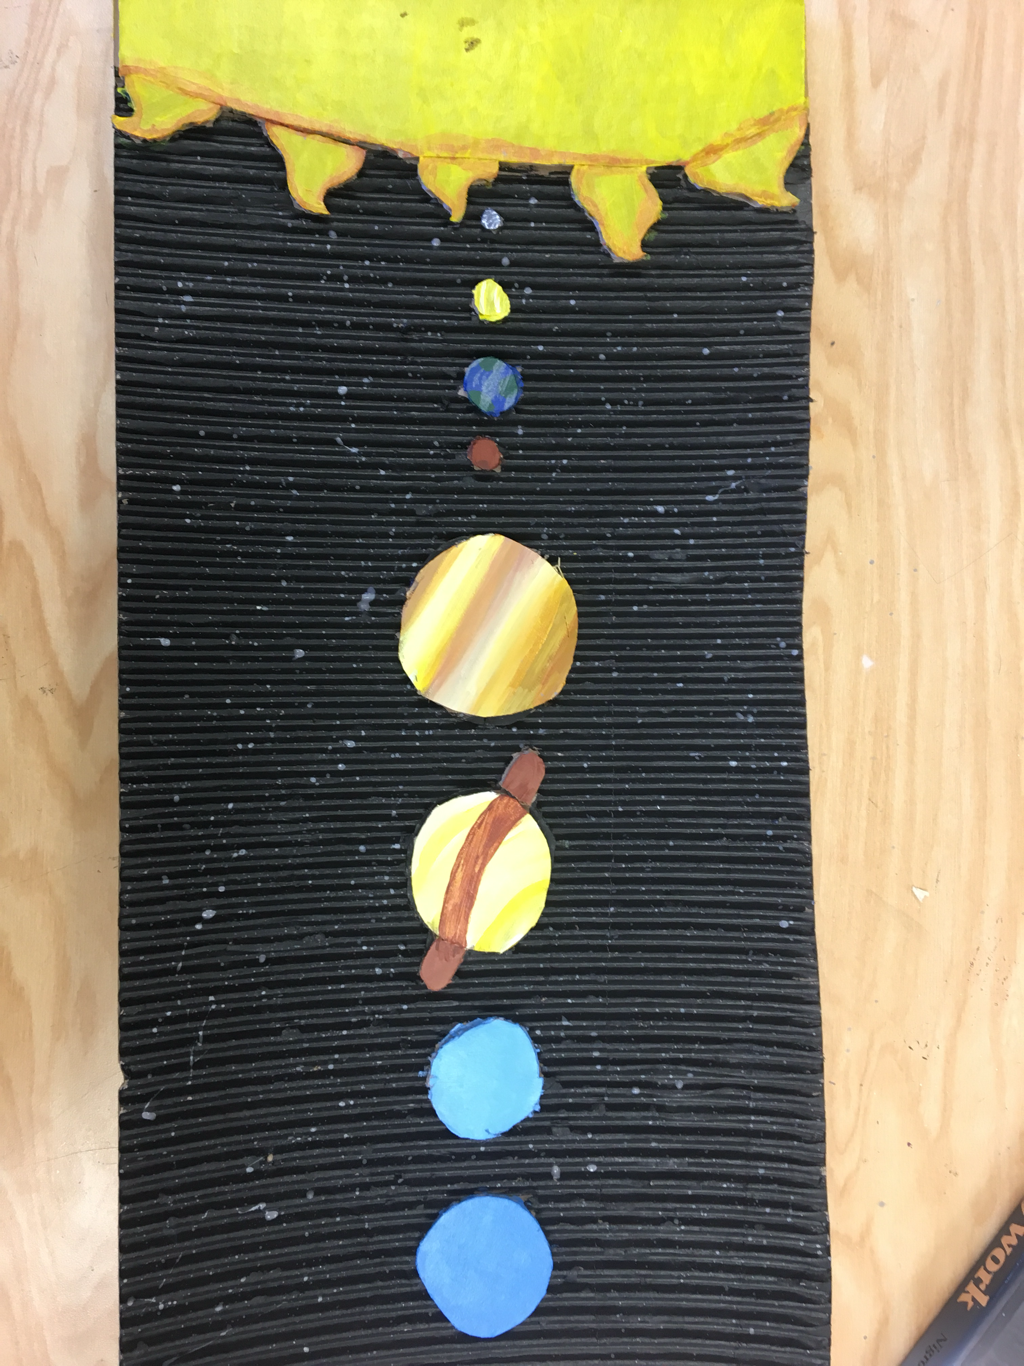
My tile piece turned out pretty good, I really like how the colors completmet each other. The silver acrylic over the black glaze is my favorite, gives it some attention. My cardboard piece I'm not as happy with, but Jupiter looks really good thats the only great thing I see. If I was to do my tile piece again I would place the glass somewhere else, because you can barley tell it's there only if you really look at it. So I would try putting the glass around the brighter colors if I did the piece again. If I was to do my cardboard piece again, I would work on the sun more and try to give it more detail but I was pretty rushed. My tile choice was supposed to be around nature, so I started out with a tree and just ventured out from there. My cardboard choice was just the first thing that popped into my head. "Space" 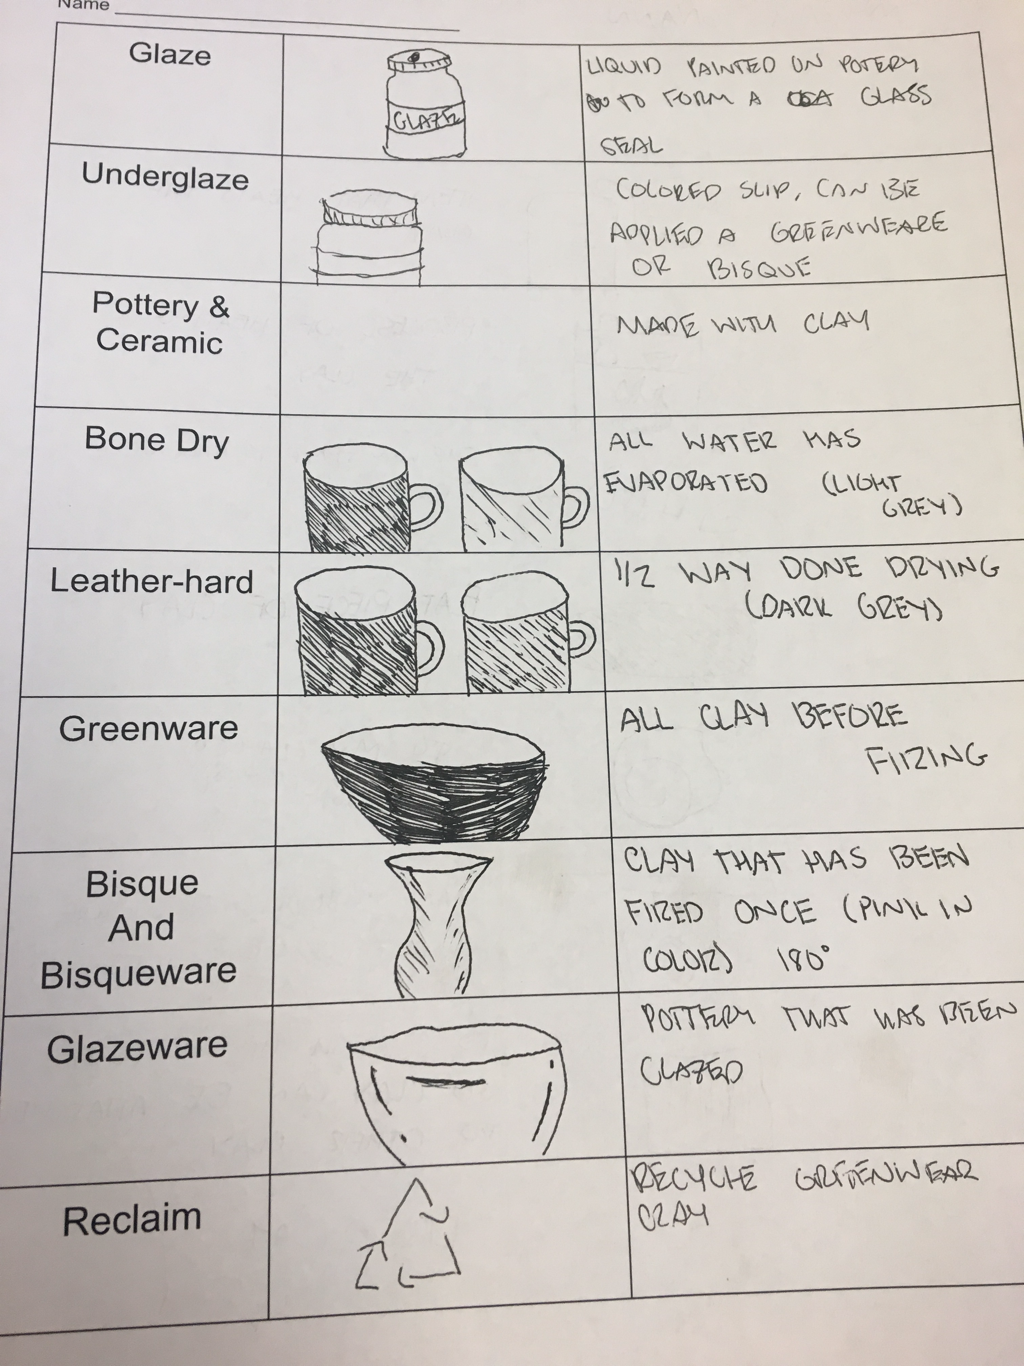
Unconventional Project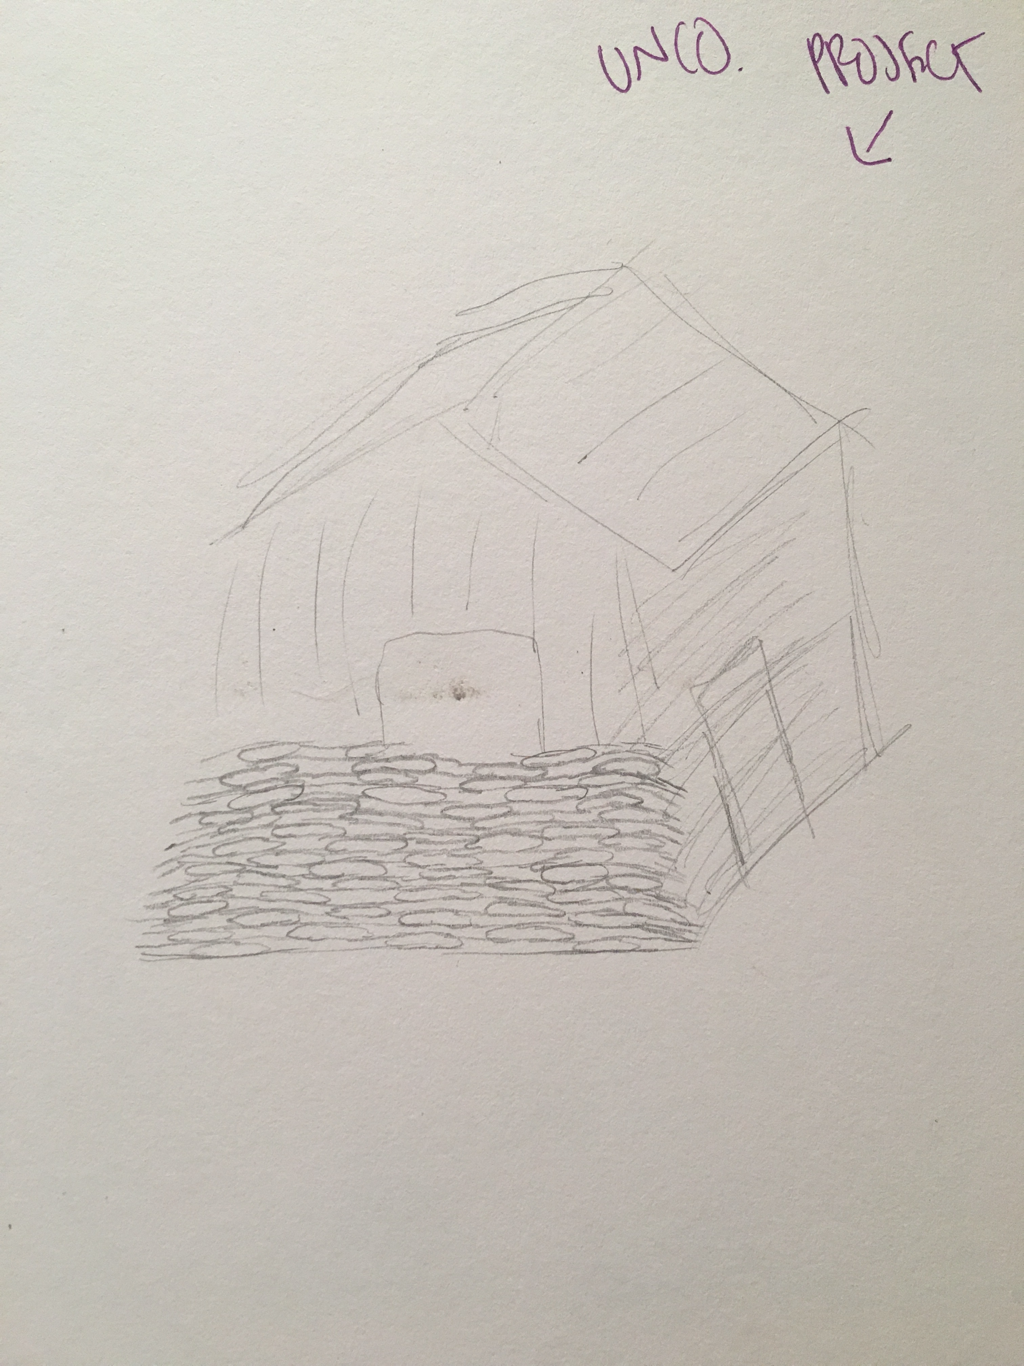
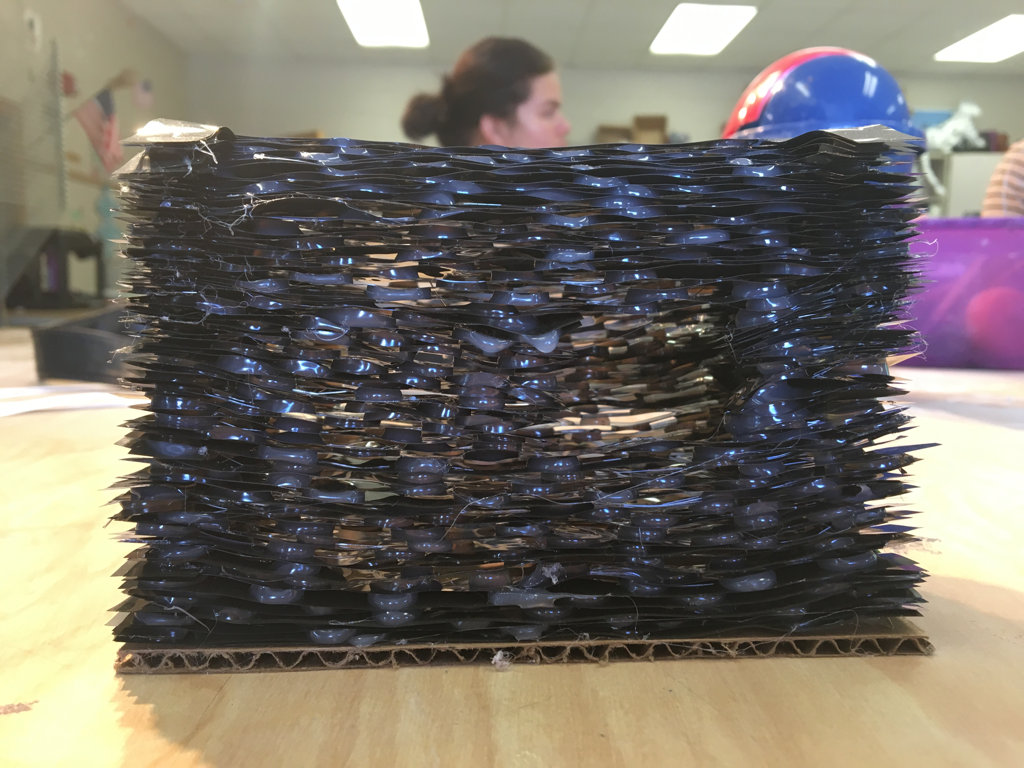

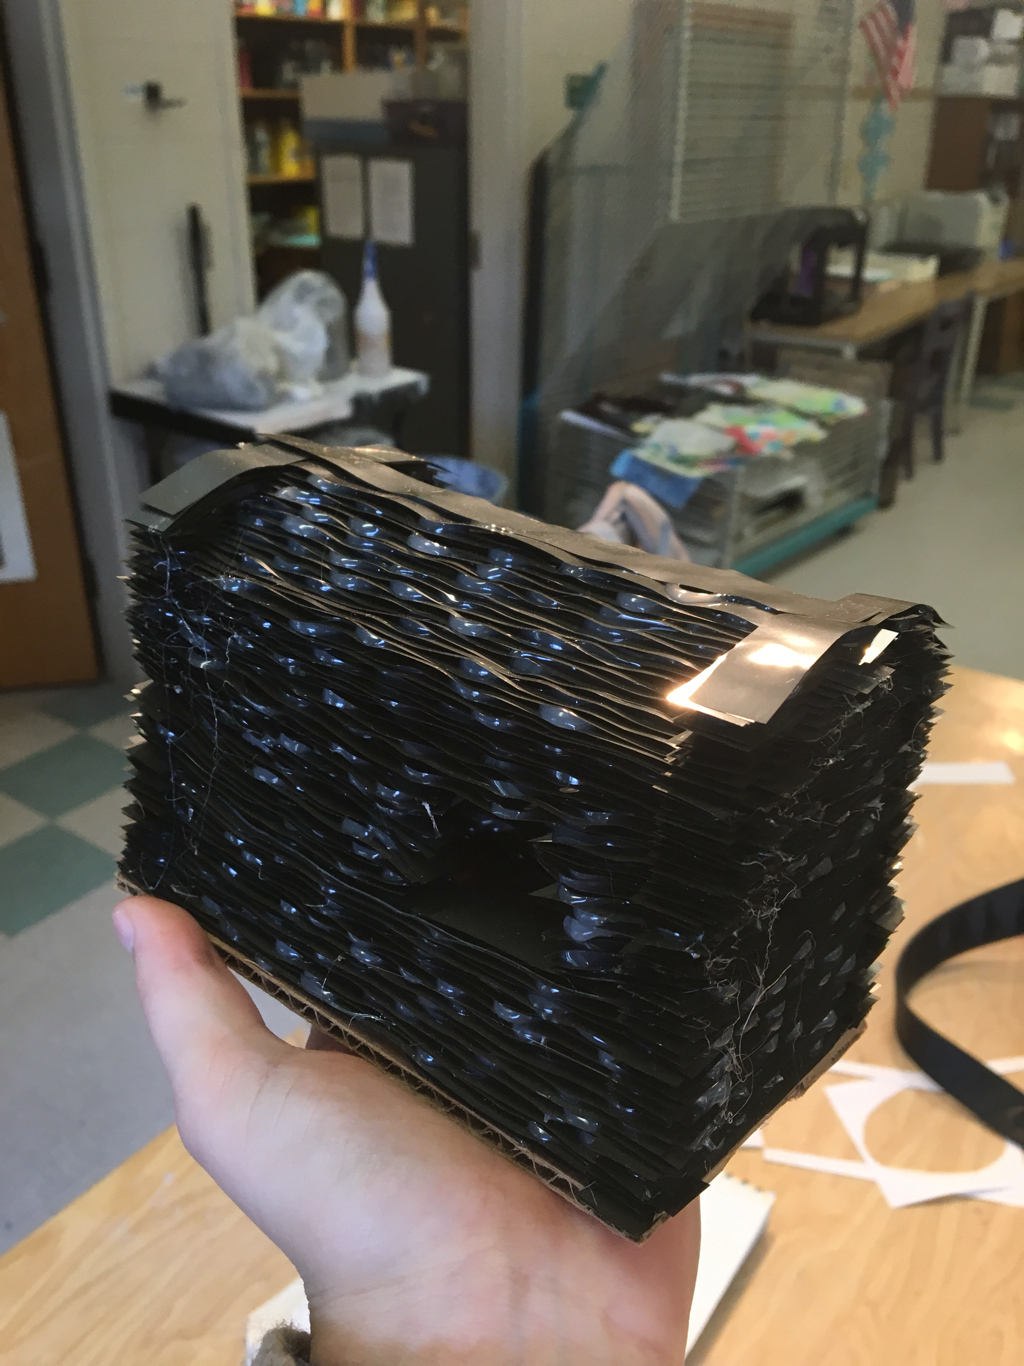
My material that I used for my project was a old CD from a 60s computer. The difficult part about working with this material is that the layers are very thin so they would be harder to place and lay exactly where you want them. I decided to make a little log cabin, because I started layering them and the idea popped into my head to do a cute lil cabin. A good part about my piece I think is the windows, they turned out more even than I expected.
Inspired Artist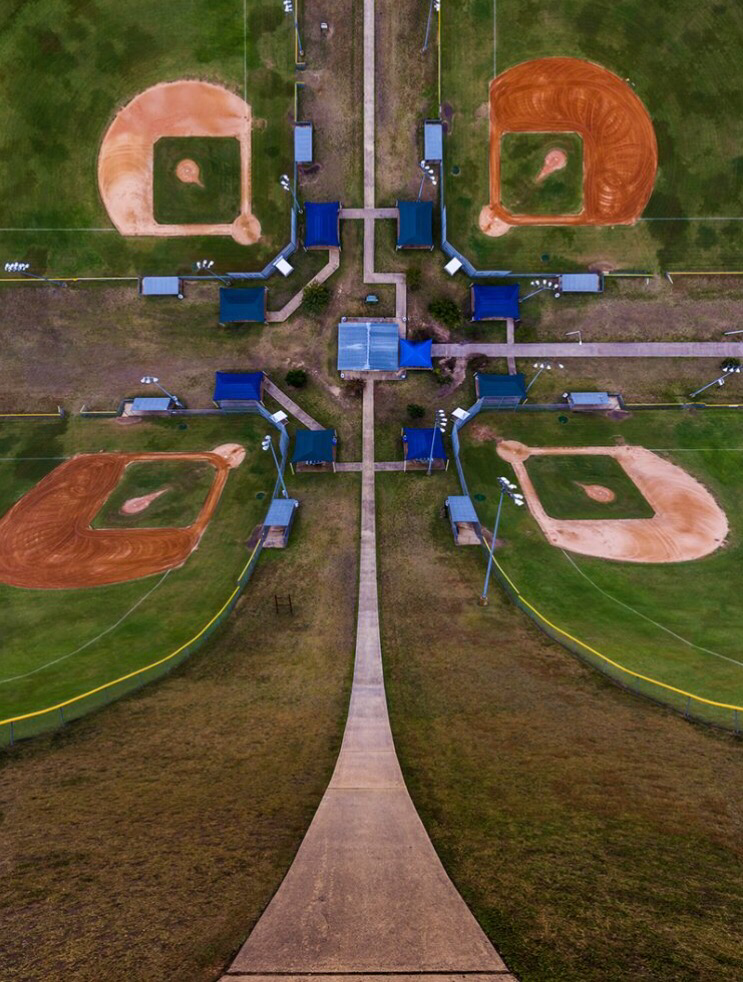
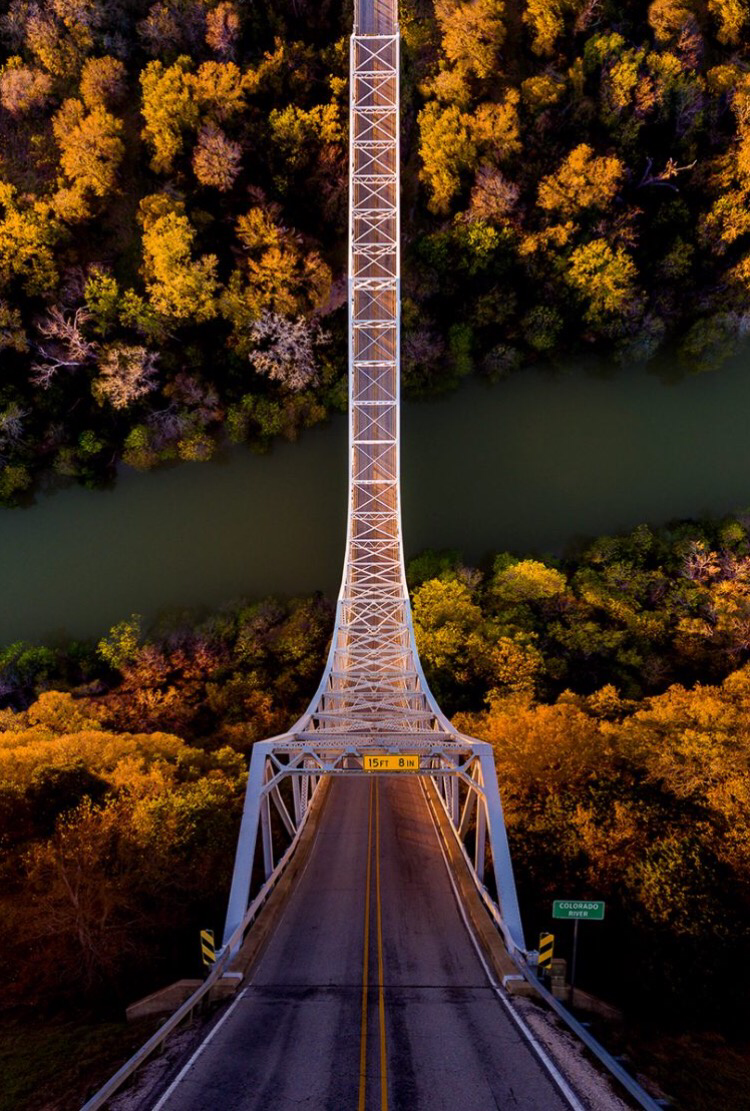
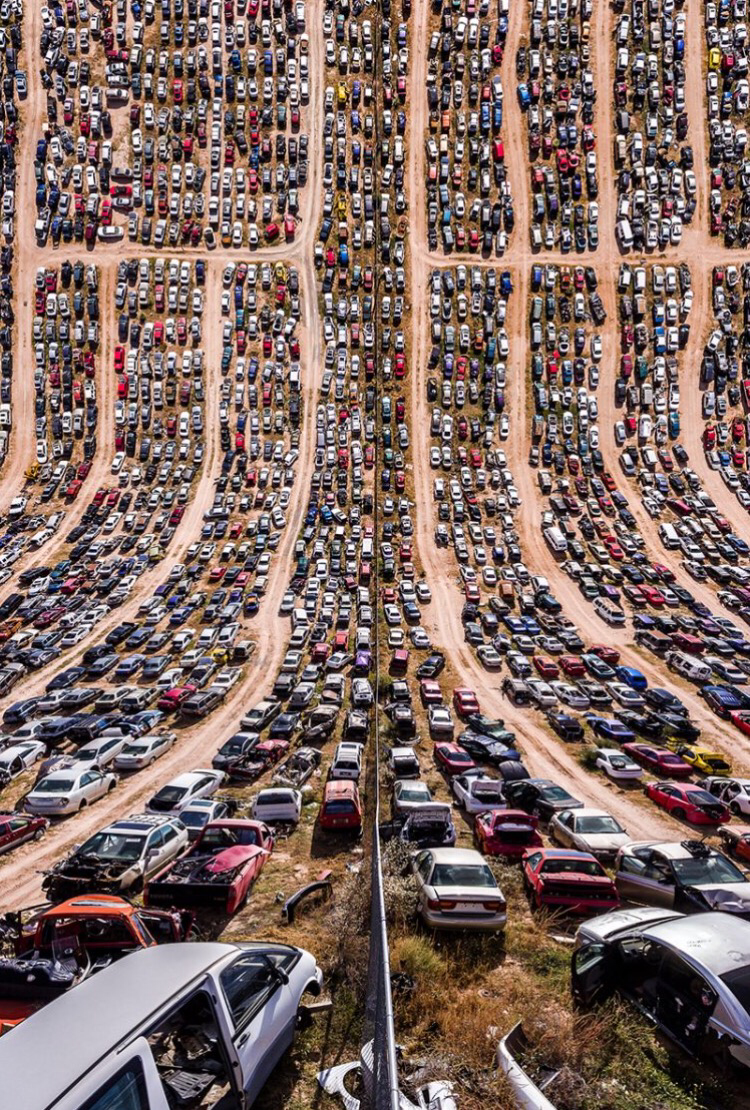
These intriguing photos are done buy the Turkish photographer and digital artist: Aydin Büyükats. Theses photos are taken all around the world with a aerial drone, about 18-20 photos are stitched together digitally which creates the curl of the photo. Büyükats was inspired by a 100 year old novel called Flatland, which is about a 2-D universe with geometric figures.
http://l.instagram.com/?e=ATOnTua3PxazSIS3S7he4h7trpJz9T5yNQPH8sRK6ztLersJHflHAMk4ZdZmc1o&u=http%3A%2F%2Fwww.facebook.com%2Faydinbuyuktasphotography I really enjoy looking at photos like these because they make me start thinking of how the world could be... if it was like those photos. Also looking at unrealistic photos of real life things is pretty amazing to me. Looking at those kinds of things just make my mind run, I like it.
Masking Tape Shoes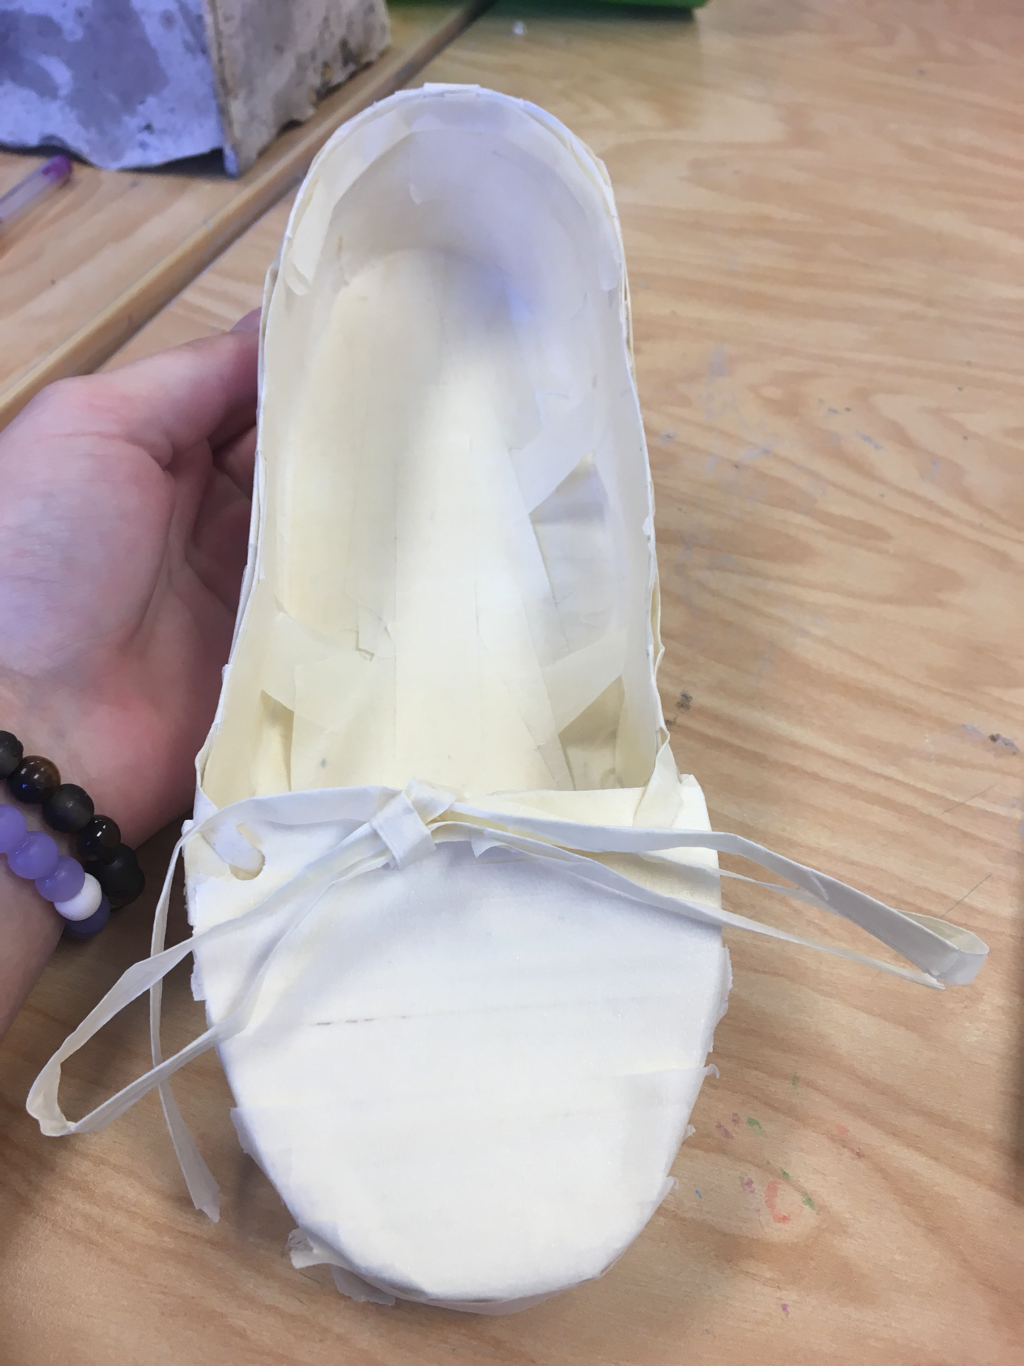
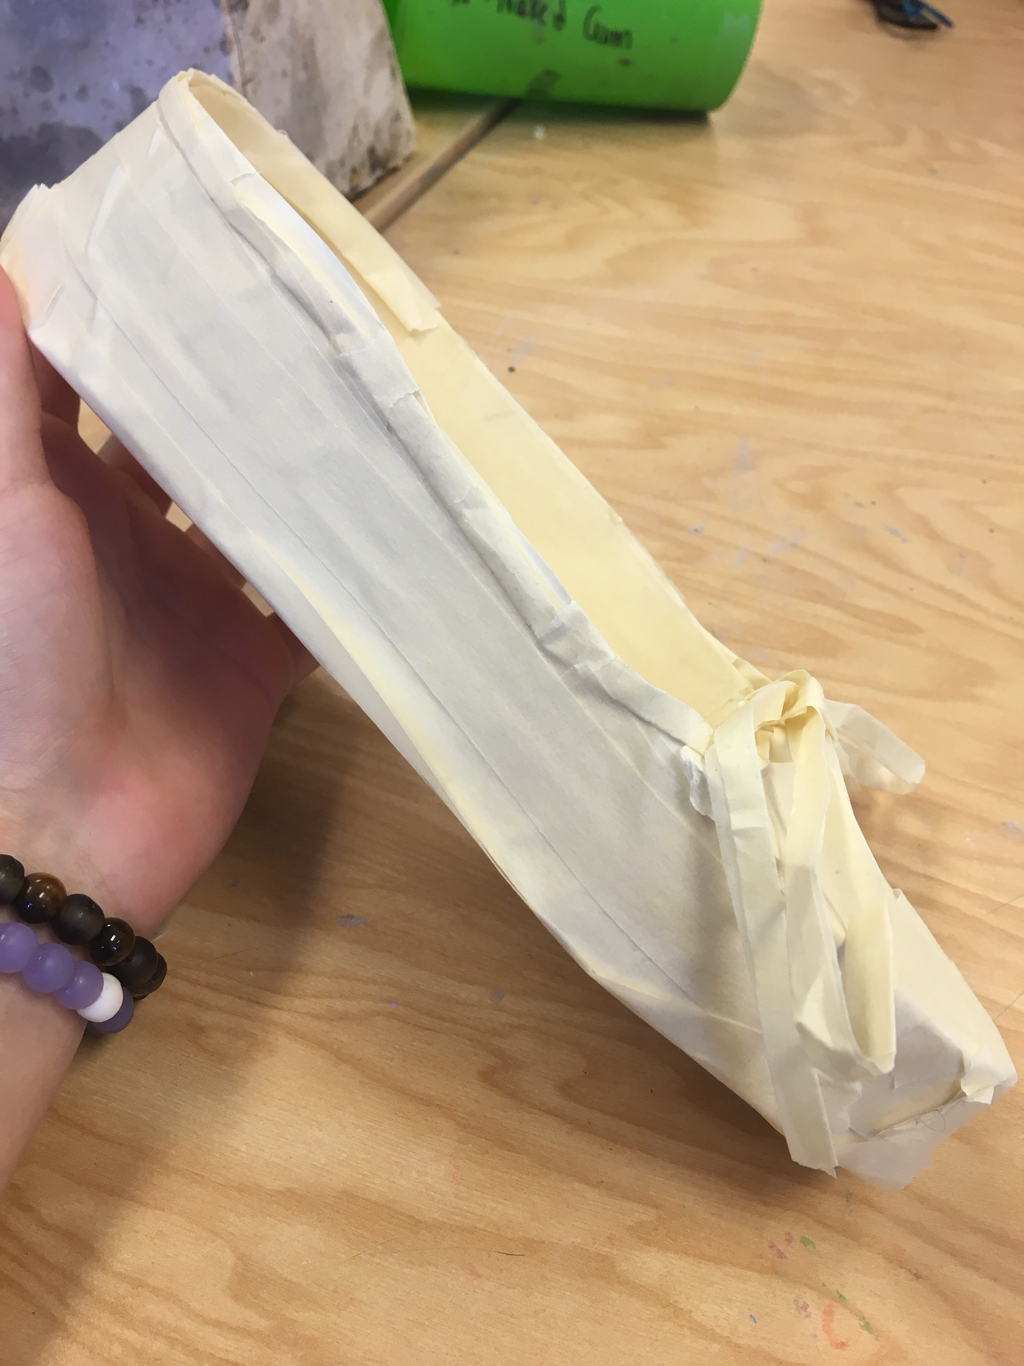
The first step in the making of this project was shaping out the base. Using index cards and matching a shoe, tracing the outline. Then cut standing note cards are taped to edge of shoe. Taped all around. The rolling of the tape was done buy folding the edges of the tape in and wrapping it around itself.
I thought the overall shape worked the best for me, it seems like a wearable shoe. I would want to make the shoe smaller next time, to try and work with the detail more than the actual structure of the shoe. Pit Fire

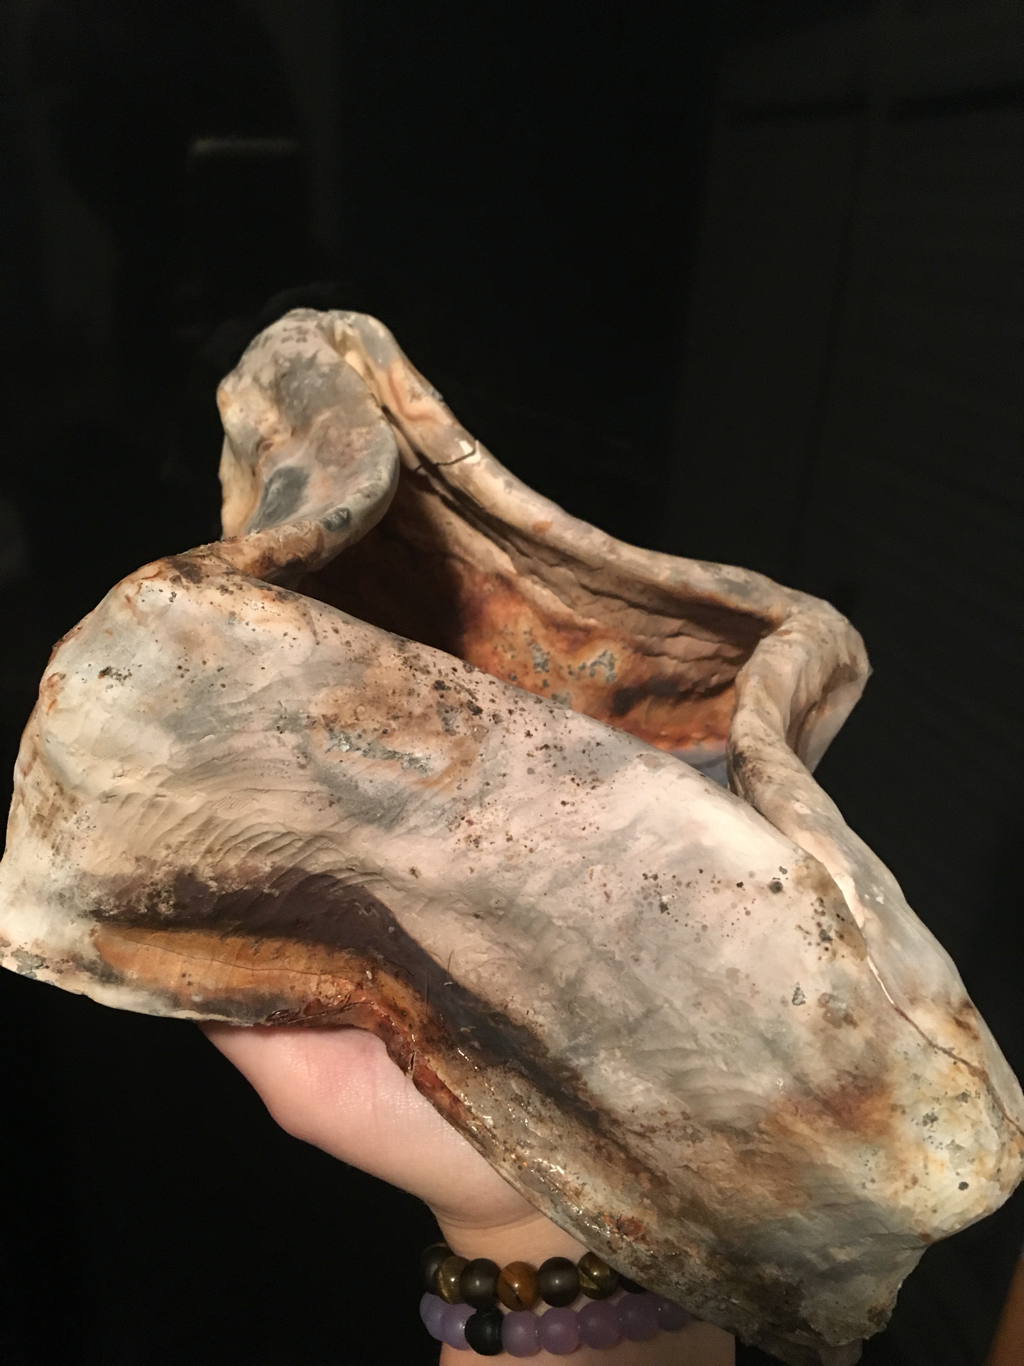
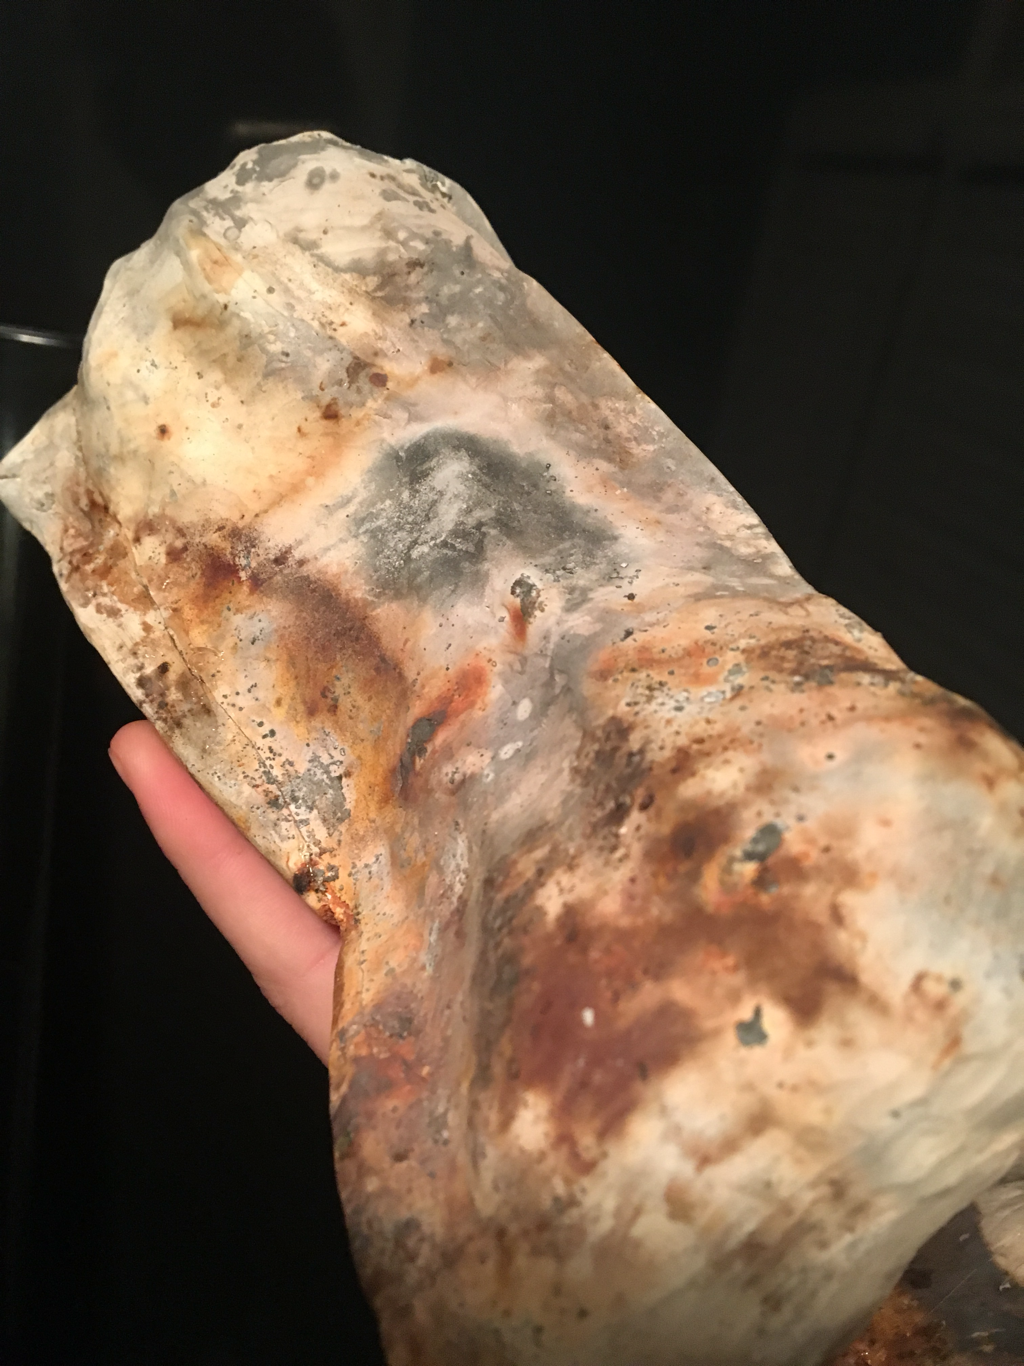
Pit fire is a intriguing form of pottery. You first would start with a fired piece of pottery and start wrapping, stuffing, placing anything that can burn on to your piece. Then the pottery is taken to a huge fire pit in the ground and is tossed in with other pieces, then setting the entire pit on fire and letting them all burn over night.
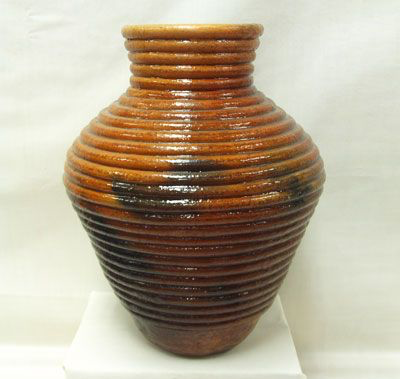
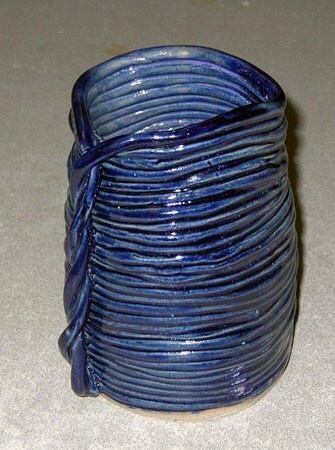
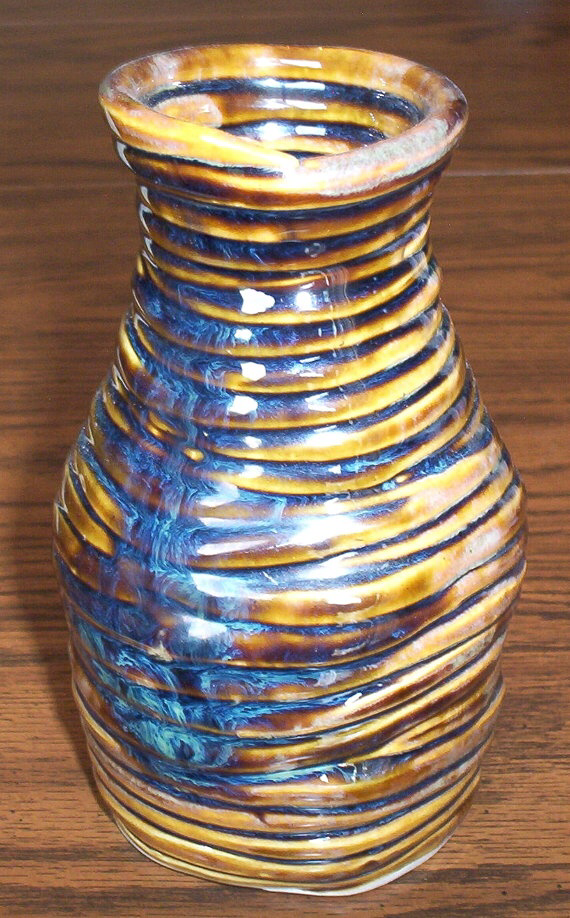
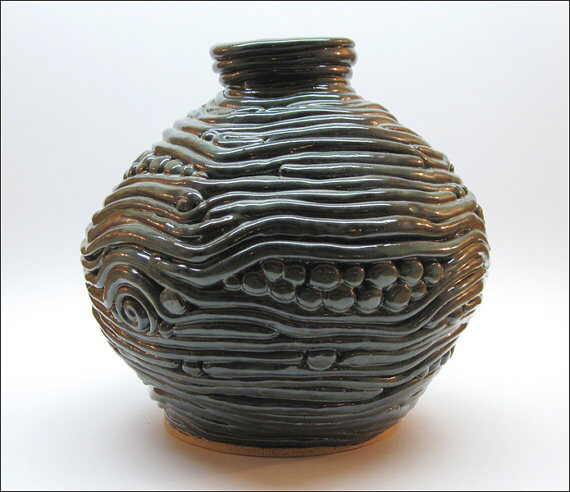
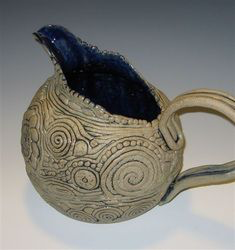
I really liked my piece. I think the points of the edges worked out great for me because they stayed smooth and didn't crack or split on the curve. If I were to do this again I would want to stay with the same base because I just like the shape but I would try going in and out wit the coiling, instead of going straight up. Throwing On Pottery Wheel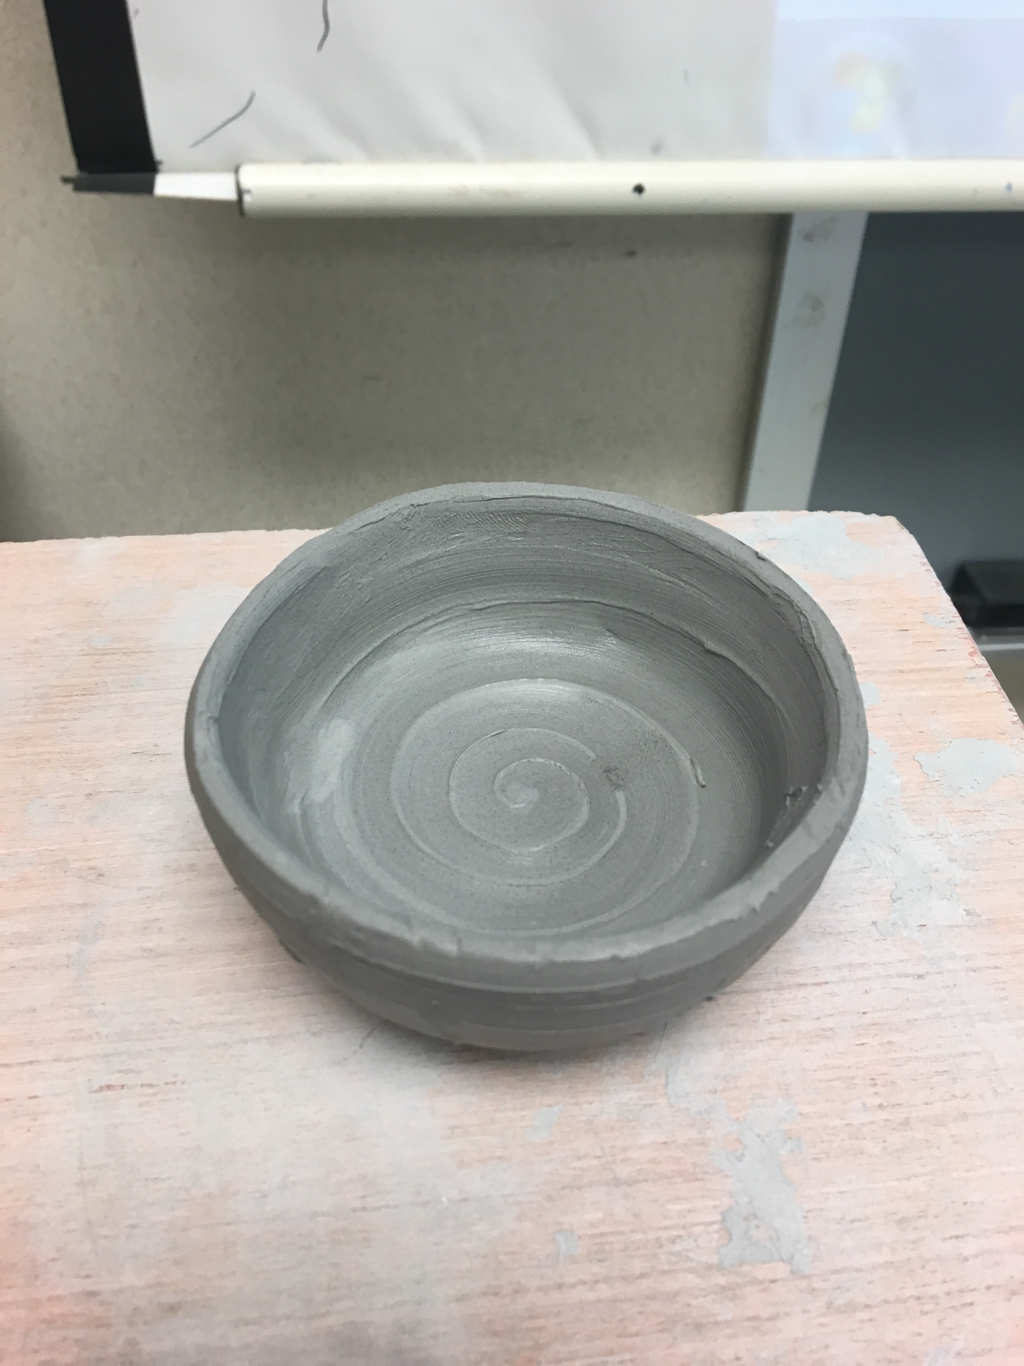
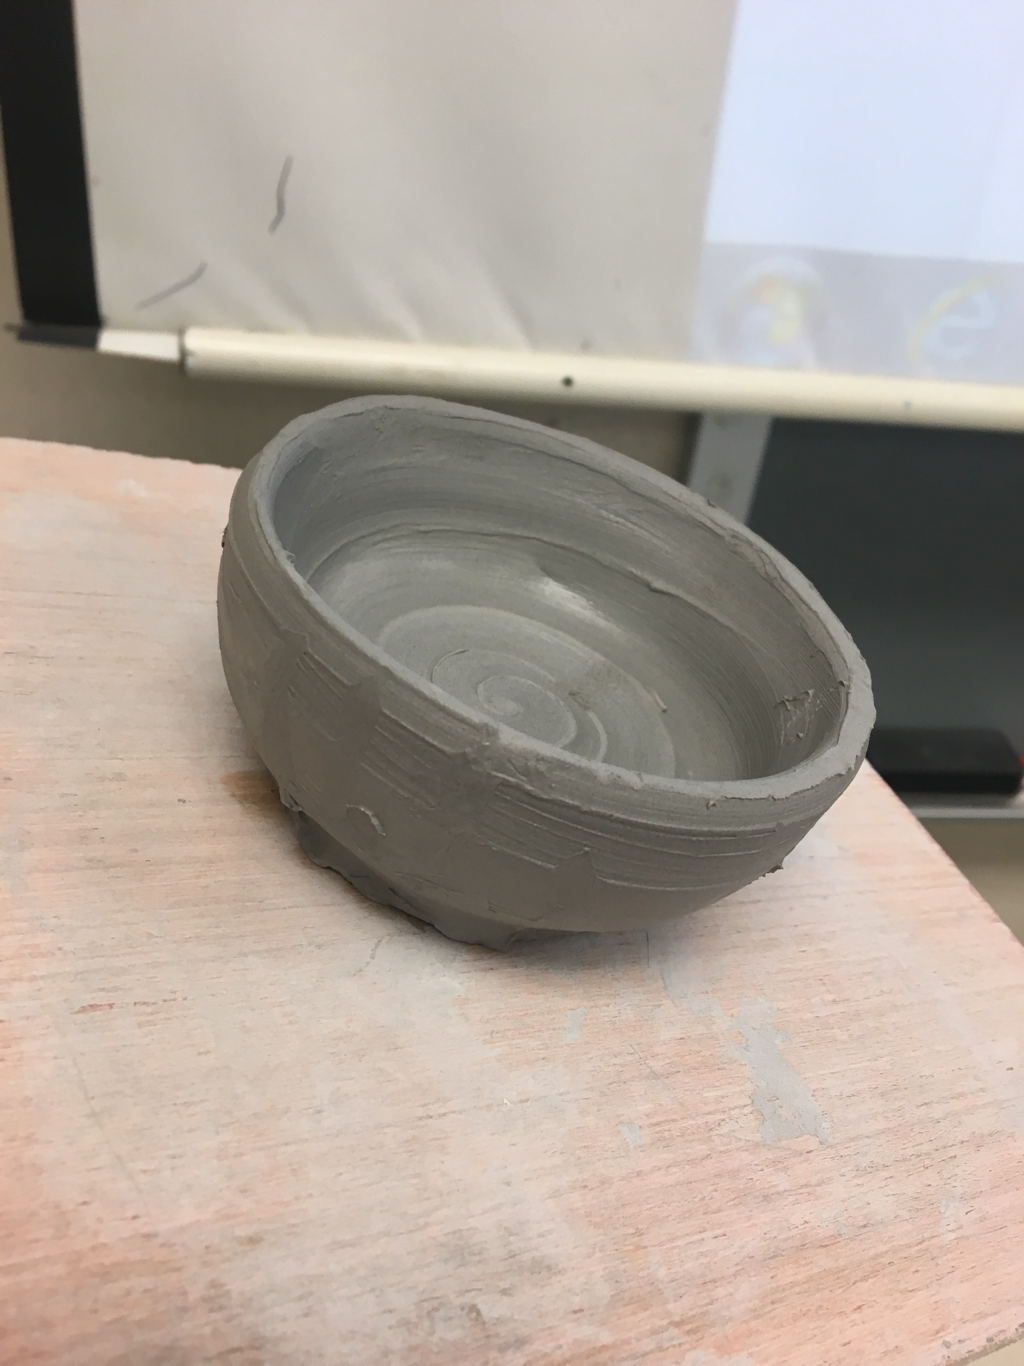
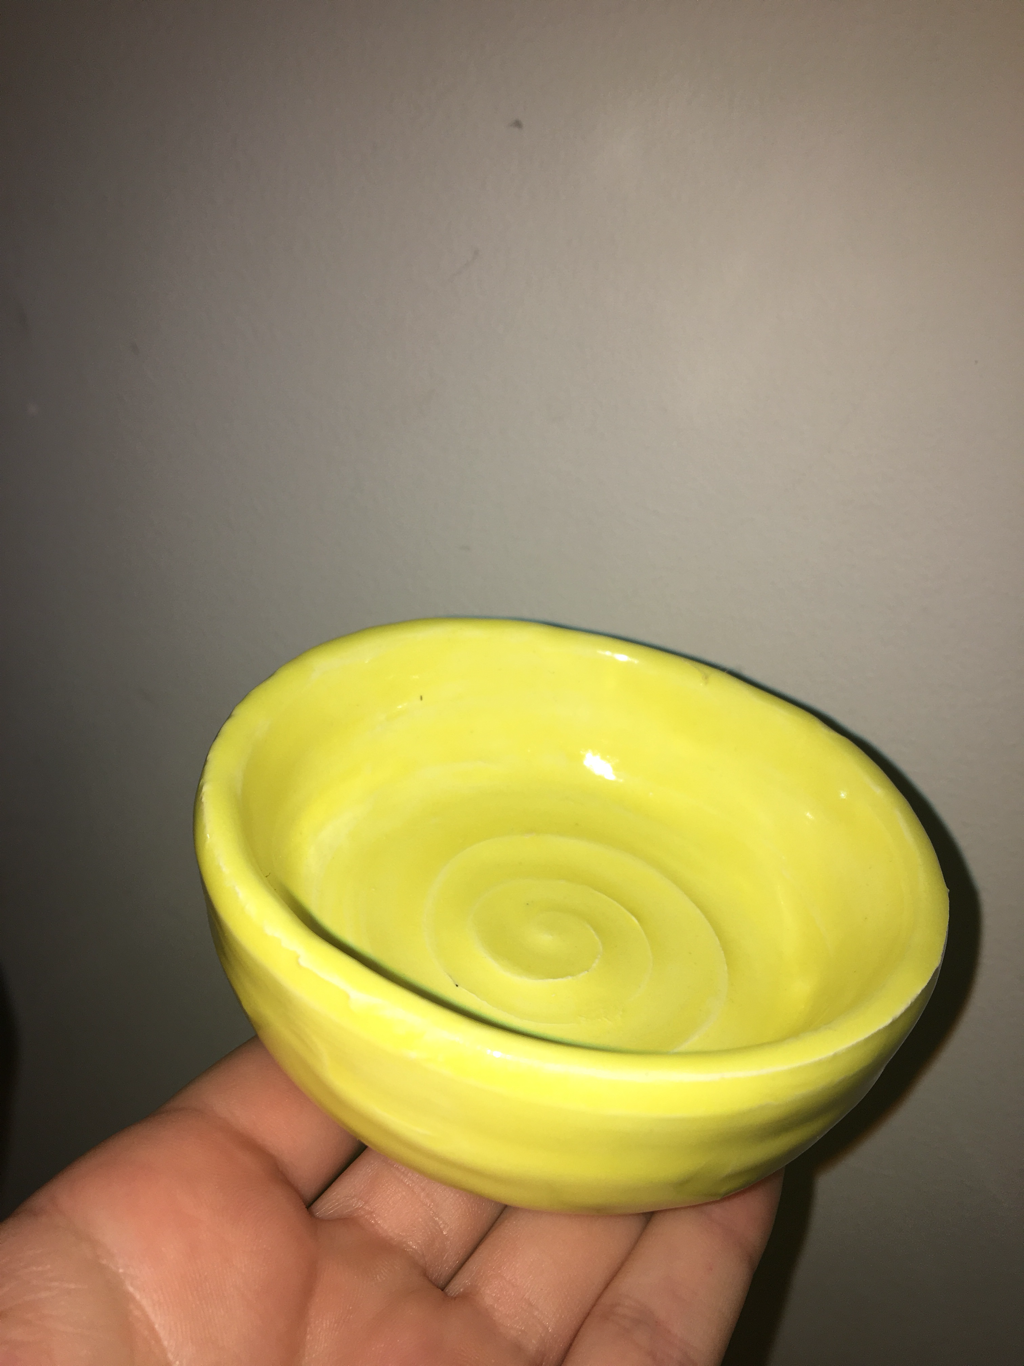
Throwing on the wheel is amazingly satisfying. First slapping the cone shaped, fist size clay onto the wheel, then smoothing the bottom edge so water doesn't get under the clay. Then cupping your hands around the clay to center it, once centered start pushing thumbs into center until about a quarter of a inch is at the bottom. Then from there you can pull it, pinch it, grow it, or shrink it. Let your imagination run wild.
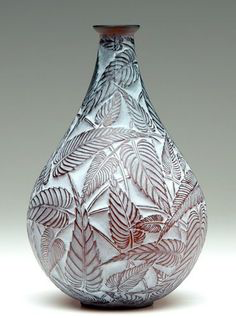
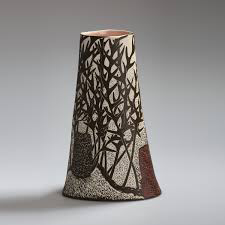
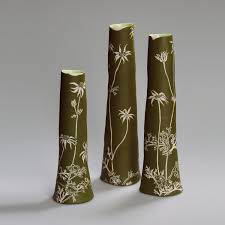
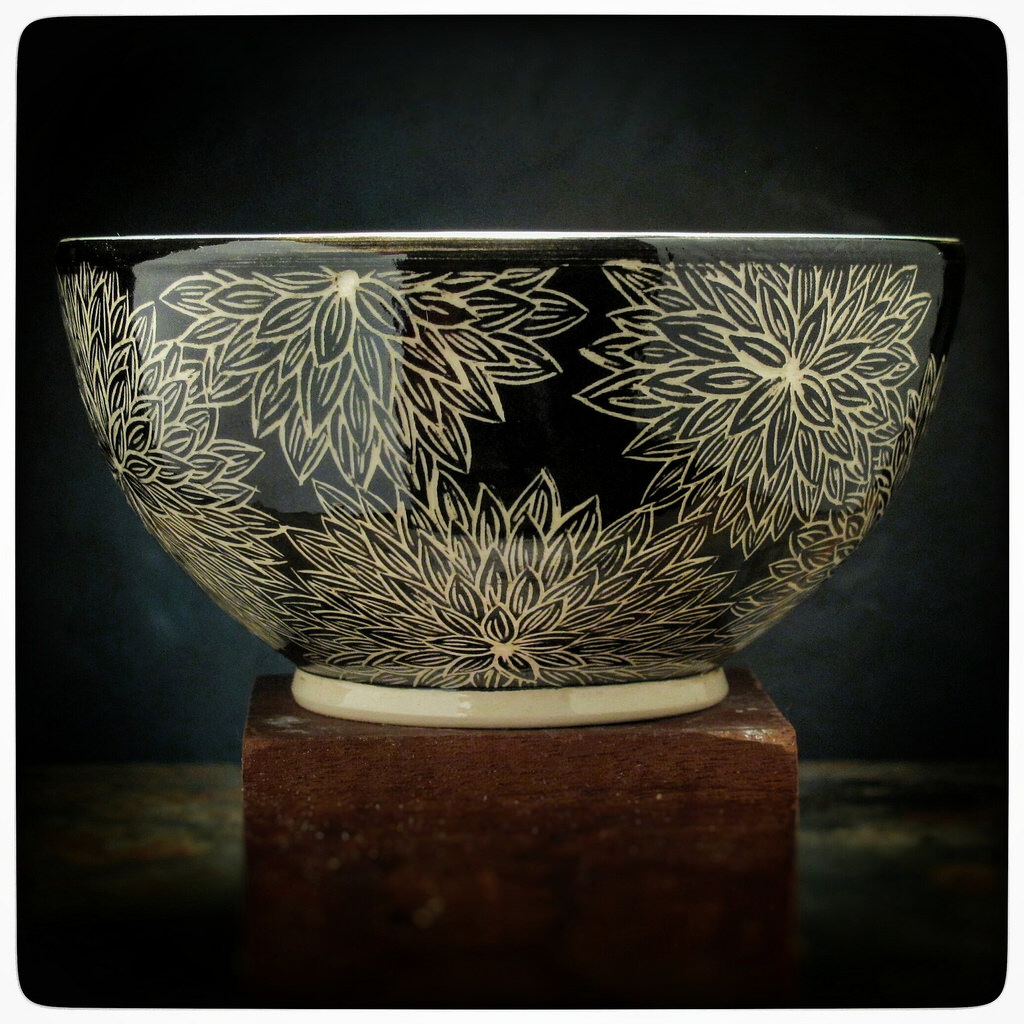
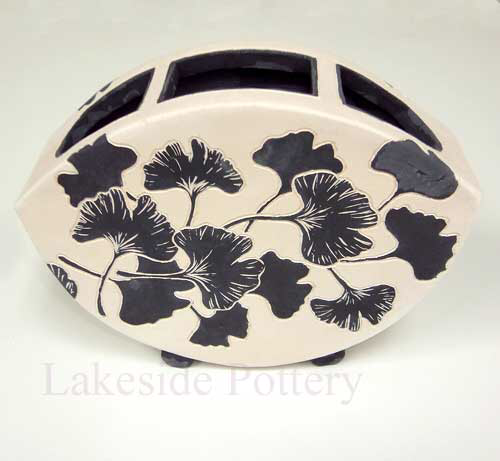
The wheel was really easy for me actually, I didn't have any troubles really. Maybe the shaping and form of the clay I could definitely work on, but that comes with practice. Centering the pottery went much better than expected, during the process I thought that it would take FOREVER to get it straight, but I caught on pretty well. Sgraffito |
 RSS Feed
